Basics of Manual Configuration of a Digital Camera: How to Control Image Quality Using the Camera Settings
I can assume that if you are reading this article, you either want to purchase a camera or have already done it and now you are interested in all of its features. Usually, once you buy a new camera, it can take a long time to explore its features and continuously learn new functions and modes. But how to not waste time and immediately understand the basic functions of a new device and quickly start taking pictures? In this article, I will tell you about the main points to consider when mastering a new technique.
Regardless of the type of photography: portrait, macro mode, landscape, or group photos, photographers need to know how to handle the camera so that the quality of photos is on top every time, and the images require a minimum of retouching. In addition, by customizing the camera parameters by themselves, the photographers will create amazing effects and make sure that the image looks exactly the way it was originally intended.
-
ISO
So, the first and crucial indicator that every beginner photographer needs to understand is ISO. The sensitivity of the camera’s sensor to light is indicated in special units of the ISO system. Increasing the ISO setting makes it possible to reduce the shutter speed, which, in turn, will allow you to get normal photos in cases when a lower sensitivity would have required a tripod. That is, the higher the ISO value, the more photosensitive the sensor is. Moreover, it is vital to understand that the higher the ISO value, the less time it takes for the sensor to scan the image from the lens.
In fact, the ISO value is also responsible for the appearance of image noise. It is a grainy veil in the photo that blurs the details and makes the photo much worse. The higher the ISO, the more noise there will be. And the lower the ISO, the less noise the photo will contain. To get the best quality pictures from your camera, you need to shoot at the lowest ISO setting. Very often, these are ISO 200, 100, and 50. When choosing a camera, always look at the minimum and maximum ISO values, and remember that in 90% of cases, you will not need to shoot at extremely high ISO because it simply cannot provide proper image quality. Therefore, professional photographers have a concept of working ISO, which refers to the maximum ISO value at which the camera can produce acceptable results.
-
Aperture
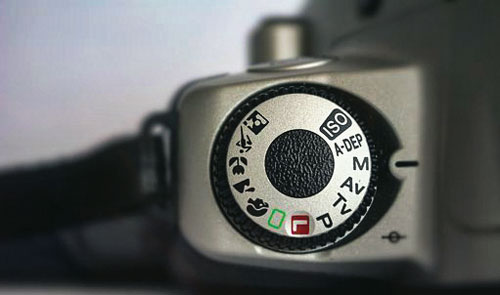
The next important value is the aperture. The aperture of an SLR camera is the round part of the camera that regulates the stream of light that flows into the camera. As it narrows and expands, it forms a gap through which light enters the sensor. The aperture is usually labeled with the letter F (or f). The number after the letter F (f) is the aperture value. For example, F3.5 (f/3.5) is an open aperture (large opening in the lens) and F16 (f/16) is a closed aperture. Besides, the aperture value is always shown on the camera’s display, no matter which camera mode you use. If you’re using the auto mode, it’s good practice to see how the camera changes the aperture value according to the shooting conditions!
-
WB (White Balance)
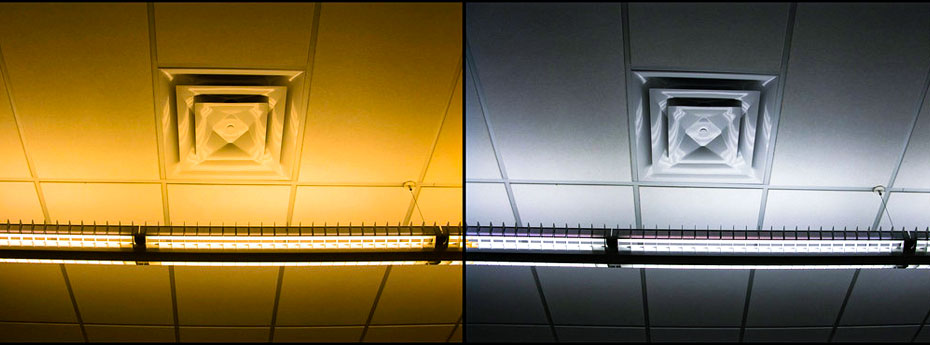
This is an essential parameter in color photography. It is responsible for the correct color reproduction. To put it simply, the right white balance helps achieve the effect that white objects remain white without different shades of yellow or blue. I’m 100% sure you’ve seen photos with too many yellow or blue undertones, which look very weird. This is a vivid example of what happens when the white balance is set incorrectly. The thing is, the color scheme of a photo depends on the light source (sun, incandescent bulb, white light bulb, etc.), and the white balance setting helps determine what light source is needed to capture the right subtones of the objects.
To achieve a natural reproduction of colors as well as tones in the photo, you should adjust these parameters even before shooting: otherwise (especially for photographers shooting in JPEG), post-processing won’t help a lot.
-
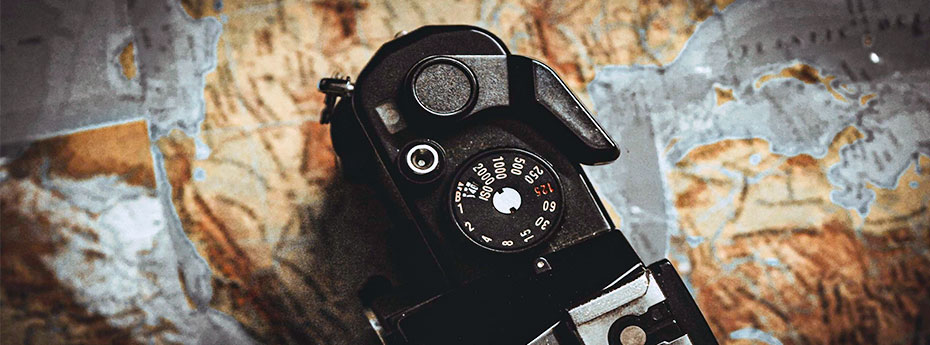
Shutter Speed
The time interval during which the shutter opens to let light into the sensitive component is called the shutter speed. As with the camera aperture, the longer the shutter flaps are held open, the more light enters the frame. This value is displayed in milliseconds and seconds. The minimum value, as opposed to the maximum, is not constant because it depends on the focus distance. By choosing a fast shutter speed, the photographer stops the moment to capture a falling drop of water or a car rushing at high speed. If you select a long shutter interval option, you will make an excellent motion photo: the camera will “catch” the object, so it will remain sharp and in focus while the background will be blurred. As we can see, it is important to set the shutter speed correctly for high-quality photography, which will help create a detailed picture at night or “catch” the subject in motion.